
Almost nothing in Nature is straight, so we better learn to draw some smooth and even curves.
Besides drawing kawaii, you can have a relaxing time and arrange curves into beautiful patterns.
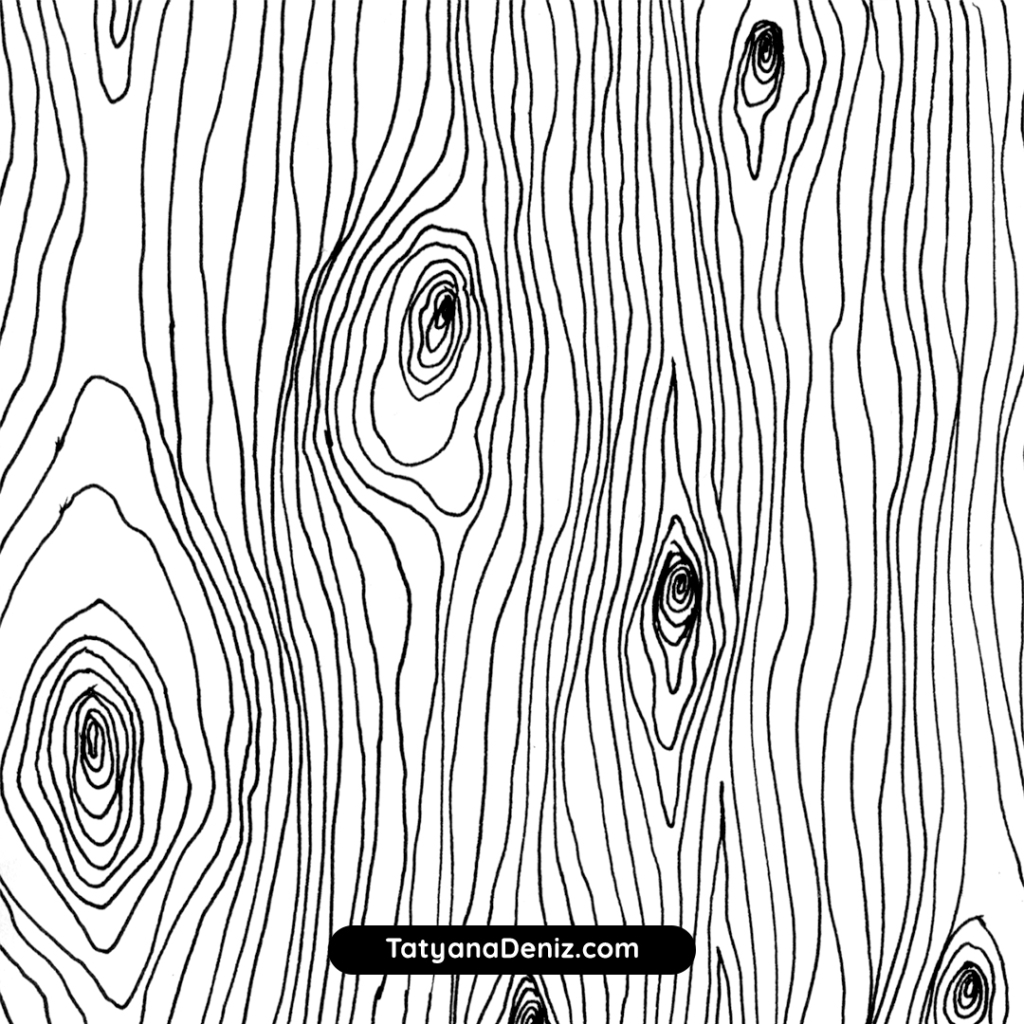
The wood texture you see here is very easy to draw. Start with a few wonky circles dotted around the page. Then draw more wonky circles around them. Finally, fill the empty spaces with wobbly lines. 😉
This was my first attempt ever at drawing wood grain, and it came out almost realistic. Yours will too!
This post is Week 2 of my personal drawing challenge to learn how to draw kawaii in 6-month.
How I Practiced Drawing Curves
I started with warm up exercises to loosen my hand, and to get some ideas on what can be drawn with curves.

First thing that came to mind was “Celtic knots”. I wanted a challenge of drawing evenly spaced curves. At the same time, I think Celtic knots look very cool.
The illustration below was done completely freehand. To achieve even spacing I used the “divide and conquer” technique that I describe in the “Techniques” section below.
To make drawing faster and more efficient, I did all sections with similar directions at once. This way I minimised the need to turn the paper.

Next I wanted to experiment with patterns inspired by Nature… The tricky part was making the lines meet gracefully in the corners. At first the lines kept overlapping in one big dark blob.
Eventually I realised that I don’t need to make all lines meet in the same corner. Some lines can just end on the edge.
I also realised that the the shapes filled with curves look like they have volume. The general direction of the lines creates an illusion that the shape is turning or bulging. Cool!

The patterns above looked a lot like hair, so I decided to weave them into wind-blown hair.
To make the hair convincing and interesting, I changed the direction of the curves as often as possible. Here is the result.

I didn’t plan to make this drawing an actual illustration (you can see some practice lines in the corners). I just saw some blank space on a page and started drawing. Then my son spilled some water on it, haha. Well, sometimes, we can do good work even when not trying too hard!
Techniques for Drawing Smooth Curves
- Start each practice session with 5 minutes of drawing free-form curves to loosen up
- Use image references similar to the effect you want to achieve. Copy the reference as accurately as you can. Then copy it again! The goal here is not to create original work (and you can’t call it your own), but to learn various techniques which will later evolve into your own style.
- After mastering a certain effect, find a photo reference (like wood grain) and try to draw it your own way, but using the skills learned from copying. I found that this produces very satisfying result!
- Pick textures that are interesting to stay motivated 🙂
- Curves look best when they change the curve direction either half-way, third-way or quarter-way through (this probably relates to golden ratio and sacred geometry)
- Look at the entire curve before beginning to draw, and check that you have enough space to move your arm comfortably. You can’t stop half-way through the curve!
- Faster arm movement produces smoother line, but allows for less control. Still, move the hand as fast as possible to draw a line that looks confident.
- Relax your shoulder muscles… Tense arms create tense lines.
- Direction of the curve matters! Since curves can describe object volumes, it is important to turn the line exactly where the surface turns. I found this to be very hard… it’s a skill that will need a lot more practice to draw accurately.
- A good way to fill an area with even curves is use “divide and conquer” approach. First draw the curve that divides the area to be filled in half. Then divide the 2 resulting areas in halves again. Continue this way until the whole area is filled.
- You can use guide lines, when filling large areas with curves. For example, to draw wood grain, I first drew 4 or 5 main lines that set the general direction of the curves. Then I filled the space around them with more curves.
Materials
Here is a full list of materials I used this week.
- Micron pen, black, size 04
- Micron pen, black, size 08
- Tombow Dual Brush pen, black
- Pencil, eraser
- Sheets of printer paper (note books stress me out! I feel that each page has to be perfect… and freeze up, but with loose pages I just compost the ones I am not happy with, haha)
Full disclosure: I personally own and use all of these. If you buy anything using my links, Amazon will pay me a small commission (no cost to you – thank you!). But if you normally shop somewhere else, it’s totally ok too.
Drawing Time Diary
Monday, Nov 21: one session, 1.5 hr
Tuesday, Nov 22: three sessions, 30 min, 15 min and 45 min
Wednesday, Nov 23: two sessions, 30 min each
Thursday, Nov 24: one session, 45 min
Friday, Nov 25: two sessions, 40 min and 35 min
Saturday, Nov 26: one session, 1.5 hr
Sunday, Nov 27: no drawing 🙁
Total drawing time: 7.5 hours
What other ways can I practice curves? Share your ideas in the comments below.
Join Our Facebook Group
Come be part of our cheerful Facebook group where kawaii art lovers share ideas, swap inspiration, and connect with fellow creatives. Let’s make something cute together!
Share the Love
Pass the cuteness along by sharing this tutorial with your fellow kawaii fans using the buttons below 👇 Let’s keep the creativity flowing and the adorable vibes alive!