Learn how to create your own kawaii art with this complete step-by-step tutorial, where I take you through the full process of doing visual research, designing your own original characters, and putting your character into different poses.
👉 CLICK HERE to Pin This Tutorial 👈

👉 CLICK HERE to Pin This Tutorial 👈
Step 1: Research
I really wanted to draw honey bees for a very long time. So to start, I gathered several pictures of bees, not just honey bees but also bumble bees because I like the look of them, with their round bodies. I made sure to get several pictures with them in different poses and interacting with different objects.

I paid attention to the anatomy of the bee, but in the end I decided the look of the bumble bee was more to my liking. Find as many or as few images as you need to help you get a good idea of what your character is going to be. If you have enough references you can create your own kawaii art out of just about anything!
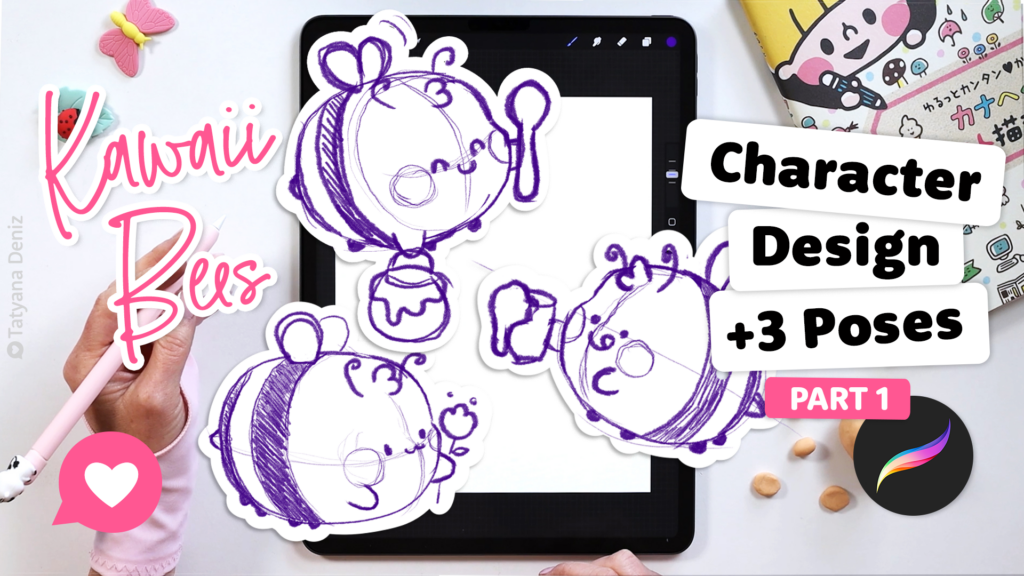
Step 2: Concept Sketches
This is where a lot of the work lies. You want to really stretch your creativity here. Every sketch of a bee, or whatever you create, will get you closer to what you’re looking to create. In my case I really liked the bumble bee, but still wanted to include honey. So I played around with
- fuzzy bees
- bees with big cheeks
- both
- neither…
…until I came up with the design I love most.
BONUS! Download my essential Procreate brushes for FREE!


Then, I created a few more designs – cause magic happens AFTER you have your “winning” design! These don’t have to be perfect, they don’t have to be cute or end game, just try new things and have fun with it!
Step 3: Design your Character
Once you have created “the one” you will want to refine the original design to create your finished art. For the purposes of this tutorial I have also utilized Plasticine (affiliate link) to help me make sure I have the proportions I like and know just where things will line up on my character. This is not a detailed model, it is simply something to help with the upcoming poses, and placement of things such as the hands, and wings.

For my bee I knew I wanted a couple things. A nice round cheek, a chubby body, and the front legs would be smaller than the rest. Since the back legs wouldn’t be used for much they didn’t need to be a large focus. The front “hands” I wanted to use for carrying things such as honey or a spoon. I thought of these things during the whole process of creation.
Step 4: Poses
Next up, poses! We’ll use our little models here as well so we can see what parts of the bee will be visible, and what parts wont. It’s easy enough to move the front “hands” around so I can see how they would look if the bee were at a different angle.

If we use the Plasticine we can also rotate our character so we can then easily draw them from all kinds of angles. Have fun with the poses, and try to make them as different as possible so you get a nice variety.
Sketch your characters following your 3D model and guides for poses. Give it a go!!! It’s not as hard as it looks. 😊
In the next tutorial, we’ll learn how to outline and color our art. And we’ll even create a custom phone case design!! Check it out!
Watch Next
If you enjoyed this tutorial, you will also love:
- How to COLOR Line Art in Procreate
- How to Draw Characters in Perspective: Step-by-Step Guide for Beginners
- Color Tools in Procreate | Procreate Tips and Tricks 2021
- How To Draw Kawaii Pun in Graffiti Style in Procreate
- How to Use Drawing References Without Copying
Join Our Facebook Group
Join our safe and friendly community on Facebook to share your kawaii art, get feedback, and connect with like-minded creatives. Create, share, and celebrate cuteness together!
Share the Love
If you enjoyed this tutorial, share it with your friends using the buttons below. 👇 Let’s create awesome kawaii art together! ❤️