
This week I practiced hand lettering and typography. It’s a big topic, so here is Part 1. 🙂
This is Week 10 of my 6-month kawaii drawings challenge.
A picture is worth a thousand words. But better yet is a picture + words!
Drawings and doodles can benefit greatly from a few whimsical letters and words. They can communicate the message of the artwork, or they can become beautiful images in themselves.
Below are examples of gorgeous lettering designs, along with a book that will teach you how to create lettering designs yourself.
6 Gorgeous Examples of Hand Lettering
Lettering has always been a difficult area of design for me. Even scary! Whenever I go to sign a card, I just end up using same handwriting style I use in every day life. But for kawaii illustrations we need to use words and letters that are really expressive and that add to the picture.
Since I didn’t know where to start, I went to the one place an artist goes for inspiration 😉 – Pinterest. Here is what I found!


Many of the images I saved on Pinterest looked like they were done by the same artist and in the same style. A trend was emerging, so I decided to look deeper into it.
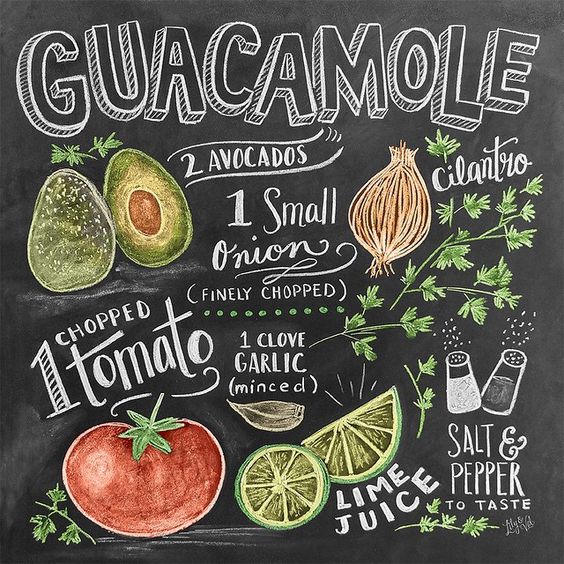
That’s how I discovered hand lettering on chalk board. And that’s how I discovered Valerie McKeehan.
Best Hand Lettering Book

I eventually stumbled upon a pin that looked like a book cover. It was! So my next step was to go to Amazon and purchase it :). What better way to learn lettering than from Valerie herself!
Here it is: The Complete Book of Chalk Lettering by Valerie McKeehan (this is an affiliate like, which means if you buy using my link, I will get a small commission at no cost to you).
So far I am very happy with a book. Valerie starts out by going through the basics of lettering and typography. She then shows examples of lettering effects (3D, texturing, shading), followed by a few typefaces to practice.
The section I found most helpful is where Valerie demonstrates places to add flourishes and decorations. For example, the tails of letters F and T are an ideal place to add a few swirls.
There is not much text in the book, which can be good or bad depending on the type of learner you are. I prefer to see pictures, so it works for me. The book covers a pretty basic set of skills for hand lettering. It’s not exactly your in-depth guide. But again, what I am aiming to learn right now is introduction to lettering. This book came at an ideal time, and I am very happy with my drawing results.
Here are a few examples of drawings I made from the book:


Next week I will continue to practice lettering by exploring lettering styles and fonts. I also plan to create at least one “original” lettering design to practice what I’ve learned. Check it next Monday, Jan 30th!
Materials Used This Week
- Micron graphic pen, black, brush and size 1
- A5 sketch pad
- Pencil, eraser
Full disclosure: I personally own and use all of these. If you buy anything using my links, Amazon will pay me a small commission (no cost to you – thank you!). But if you normally shop somewhere else, it’s totally ok too.
Drawing References
- The Complete Book of Chalk Lettering book by Valerie McKeehan
- Lily and Val website
- My Fonts website
- Pinterest website
- Photos of lettering designs I saw at cafes and stores
Drawing Time Diary
Monday, Jan 16: no drawing
Tuesday, Jan 17: one session, 20 mins
Wednesday, Jan 18: two sessions, 1 hr, 20 mins
Thursday, Jan 19: one session, 1.5 hr
Friday, Jan 20: one session, 1 hr 20 mins
Saturday, Jan 21: no drawing
Sunday, Jan 22: no drawing
Total drawing time: 4 hr 30 mins
Read all about my 6-month masterplan and track my drawing progress week by week.
Join Our Facebook Group
Come be part of our cheerful Facebook group where kawaii art lovers share ideas, swap inspiration, and connect with fellow creatives. Let’s make something cute together!
Share the Love
Pass the cuteness along by sharing this tutorial with your fellow kawaii fans using the buttons below 👇 Let’s keep the creativity flowing and the adorable vibes alive!