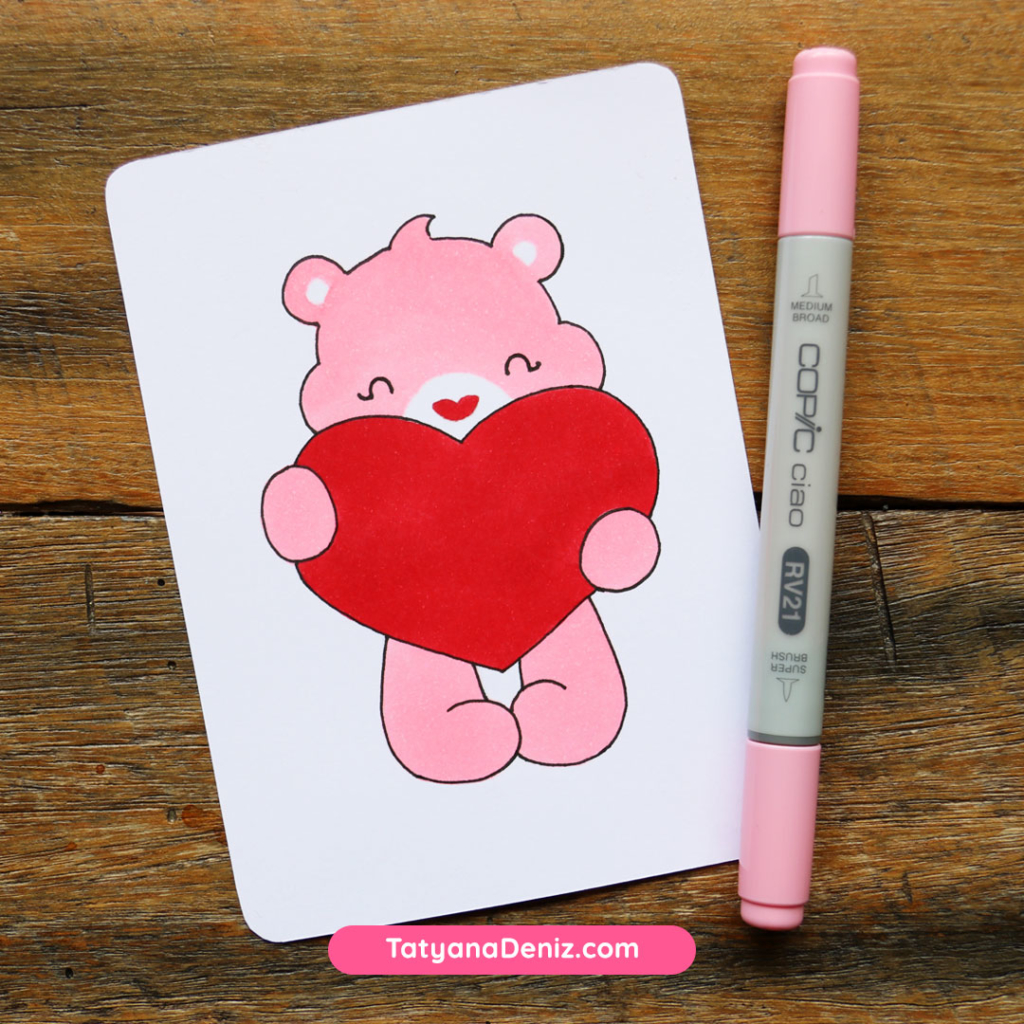

Let’s draw a cute Valentine’s Day Bear today.
And once you finish the drawing, you can turn it into a super easy and super cute Valentine’s Day pop up card. I’ll share my version at the end of this post.
Step-by-step Tutorial
This bear might look difficult to draw, so let’s break it down to simple steps. In each step you will add a small element to the drawing (see lines in red), and together they will create a cute bear.
Give it go, I promise it will come out great! ?
I’ll add a few drawing tips after the tutorial.
👉 CLICK HERE to Pin This Tutorial 👈

👉 CLICK HERE to Pin This Tutorial 👈
Printable PDF
Click here to download a FREE printable PDF with this tutorial.
Drawing Tips
- Start with simple shares, like circle for the head, egg shape for the body, and two interlocking egg shapes for feet.
- Add a middle line to use as a guide. It will help with symmetry (making both sides of the bear look the same size).
- Notice how the heart is covering the body completely. Technically you don’t even need to draw the body, but I always draw all the parts of the figure first. This helps with getting the size and pose of the character right.
Colouring Tips
I used Copic markers to colour this drawing. It was easy and fast, very satisfying. 🙂
Here are some tips, which are relevant to any colouring material you will choose.
- Do a few versions of the same drawing. If you try to get it “right” in the first go, it puts too much pressure on you. Your creativity cannot flow like that… Be gentle on yourself, and right away decide to colour the same drawing 3 times. Don’t think about it too much. Just trace the drawing tree times and colour it three times. One of them will come out great (that’s my secret, haha).
- Add the colour first, then add the pen outline. This way there is no chance that the pen will smudge. Plus it will be dark and crisp, with no pencil or marker pigment on it.
- Erase most of the pencil lines before you start to colour. Just leave very light pencil lines, so you know where to colour. This way you won’t have those pesky pencil lines popping through the finished drawing. Trust me, it’s pretty annoying when that happens. ? Although I found that some of the pencil does rub out after Copic markers were applied. So it doesn’t hurt to try.
Materials I Used

Here is a full list of materials I used to make this drawing:
- Mechanical pencil
- Erasers
- Kneatable eraser (see that grey blog on the right?)
- Tombow Mono Zero eraser (looove it!)
- Copic markers
- RV21 Light Pink
- R29 Lipstick Red
- Copic Multiliner pen, black, 0.3mm
- X-Press It blending card (special paper for alcohol-based markers, doesn’t bleed through)
My Pop Up Card Project

This was a really fun project. Big thanks to my email subscribers for these awesome ideas! This tutorial was inspired by Daania – who wanted a Valentine’s Day pop up card, and Céline – who loves Care Bears and wanted to draw one.
So this pink bear is loosely based on a Care Bare. 😉
I plan to create a full step-by-step tutorial for this card too. I will link it here.
Spread the Love
Creativity and drawing is so much more fun with friends. Here are two ways you can join our creative community.
- Join our private Facebook group, where we post drawings, give each other support, share our skills and resources.
- Share this tutorial with your friends using the buttons below.
Thank you so much for drawing with me.
Have a wonderful day!