
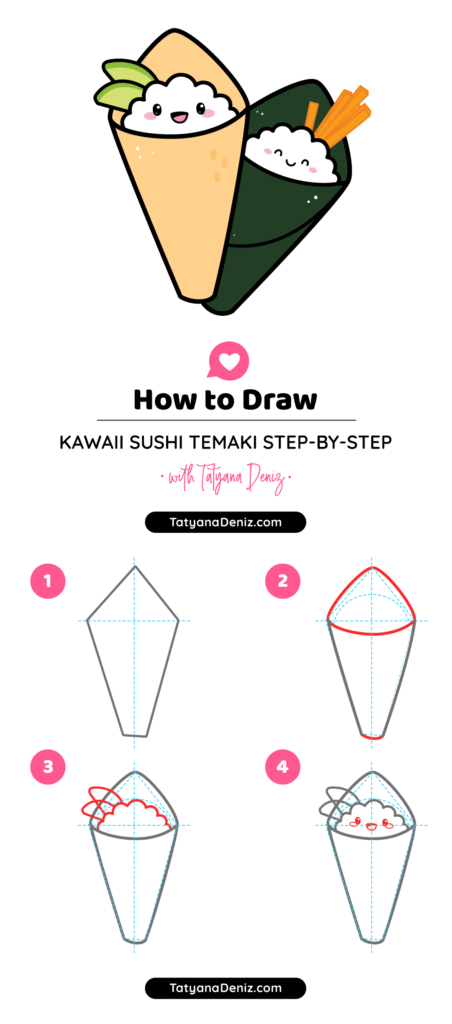
Learn how to draw kawaii sushi with me, Tatyana Deniz, in this complete step-by-step tutorial using Procreate.
Here is a fun and easy tutorial on how to draw one of my favorite foods in the world in kawaii style. Kawaii sushi! If you want to learn how to draw kawaii, draw with your kids, or start a creative business – then read on to learn all about this cute art form.
To demonstrate this drawing tutorial, I used the Procreate app on the iPad. But if you are using pen and paper, the process is the same.
Step-by-step Kawaii Sushi Tutorial
👉 CLICK HERE to Pin This Tutorial 👈
👉 CLICK HERE to Pin This Tutorial 👈
Step #1: Draw the Kawaii Sushi Outline
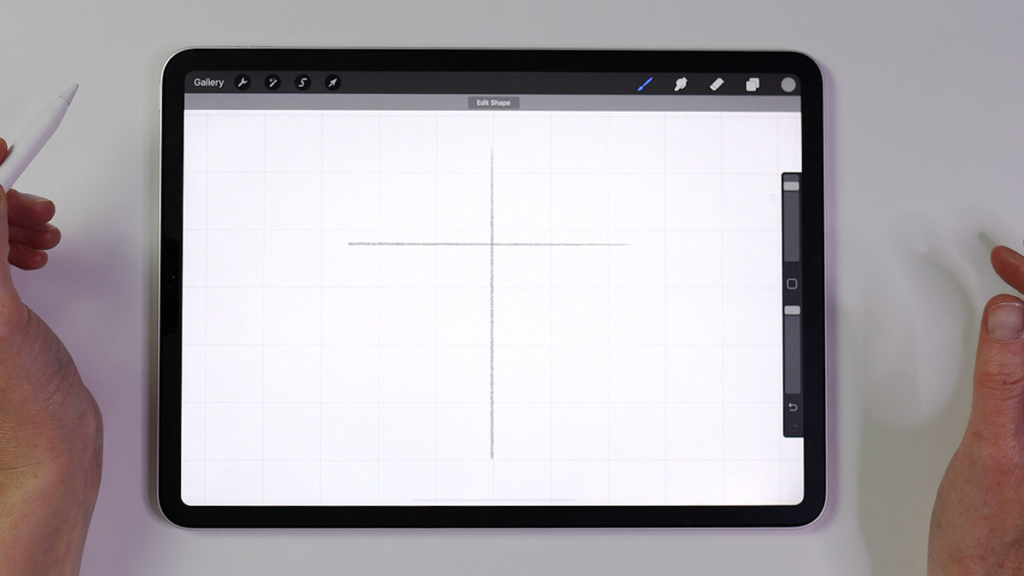
The first step, when drawing kawaii sushi, is to create the base shape. To start, we want to turn on the drawing guide in Procreate. Since we are drawing Temaki sushi (and it looks like a rhombus), we’ll create a cross as our guide to add a rhombus shape to later. This drawing guide will sit on a separate layer, so it doesn’t interfere with the outline.
Here is what your drawing should look like at this stage:
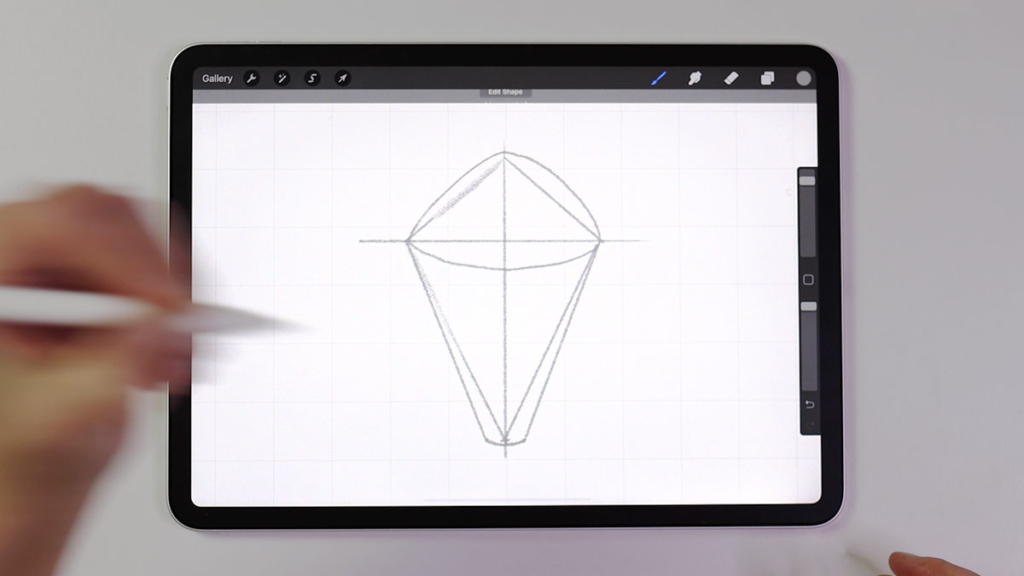
Using our drawing guide, we’re going to start to draw the rough shape of the kawaii sushi. To do this, we’ll create triangles using the cross shape.
When creating the triangles, try to make sure there is the same amount of space on each side. Here is what it should look like when you finish this step:
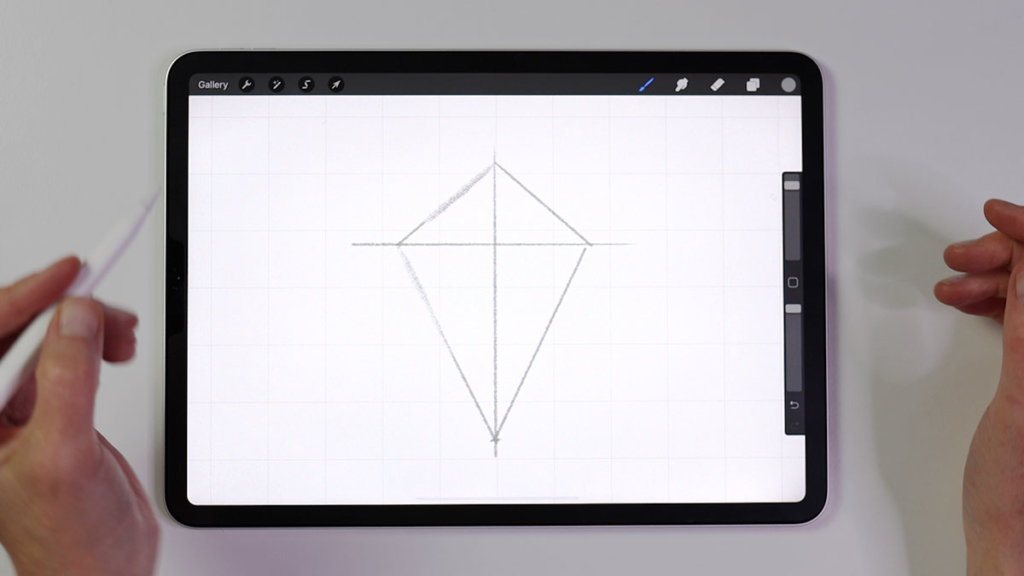
At this point, it doesn’t need to be pretty. It’s just building the foundation for what our Temaki sushi will be. Once we have the basic kite shape, we’ll create another layer.
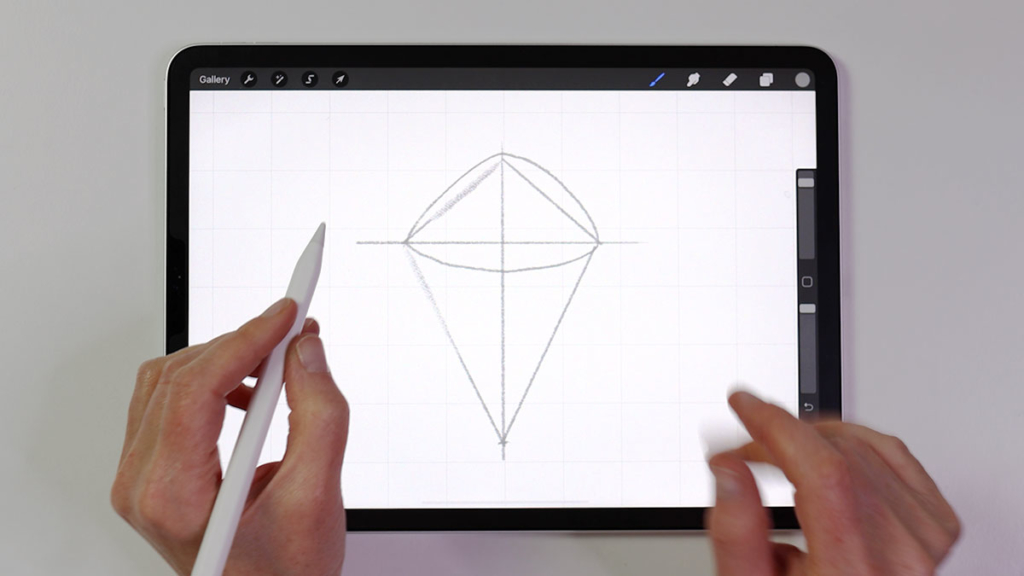
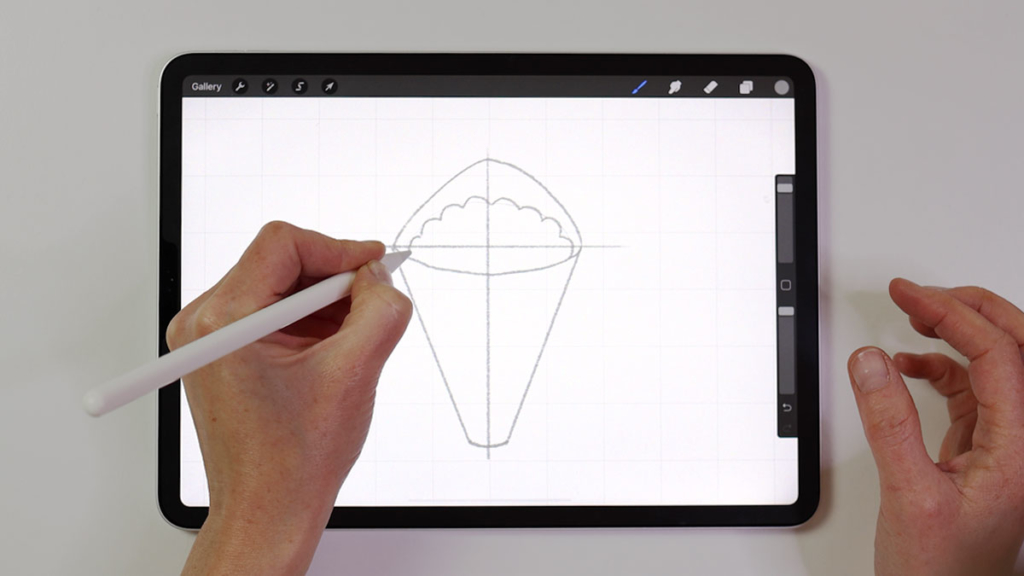
Much like a real Temaki, kawaii sushi doesn’t have sharp corners. So instead we want to create rounded edges at the top and in the front. The front arc will give us the effect of an opening where we’ll later add some fun fillings.
Now your drawing should look something like this:
Then the bottom of the Temaki usually has a hole in it, where some more goodness pops out. It’s not going to be this sharp point; instead, it’s rounded. To create this, you’ll connect the two long lines with the rounded edge at the bottom, like this:
If you’re using paper and pencil, you will erase your guidelines at this point. If you’re drawing in Procreate, then you’ll turn off the bottom layer.
Step #2: Create Your Temaki Sushi Fillings
Next, we’ll create some fun fillings for our kawaii sushi drawing. If you are in Procreate, create a new layer so you can move things around without effecting the drawing guides.
Sushi Rice
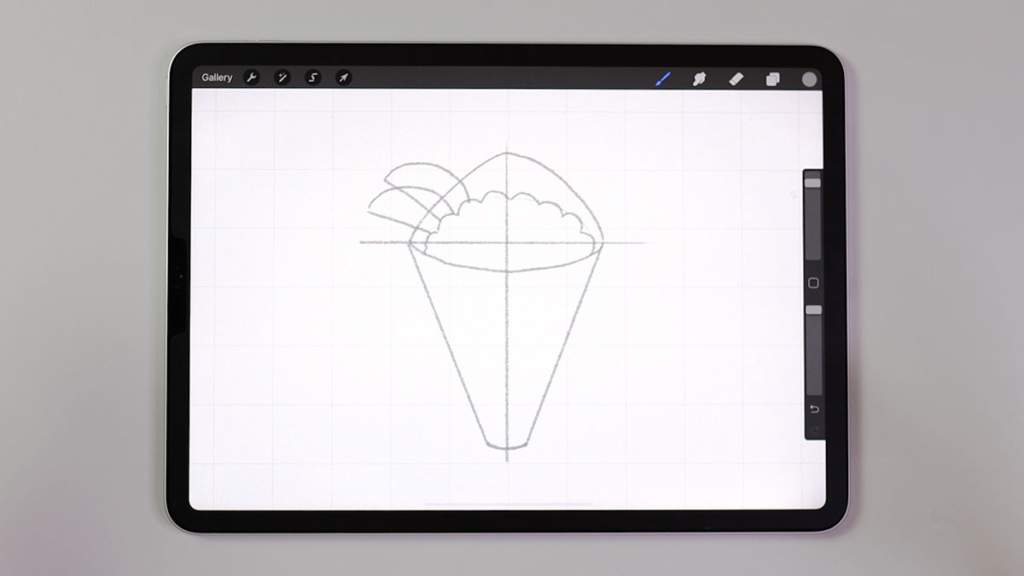
To start, we’ll add a ball of rice.
In kawaii, we use symbols to show what’s there. We’re not going to draw every single grain of rice. Instead, we’re going to give it a nice curved edge to hint that there is some sushi rice in the roll. It looks as though a little cloud has landed into our Temaki. 🙂
Your sushi rice should look something like this:
Avocado Slices
The next filling we’re going to add is avocado slices. To create this filling, we’re going to draw two half-circles (one in front of the other) that appear to come out of the rice.
Instead of trying to create the shape around the rice, draw directly through it and then erase the parts you don’t want after.
Your cute kawaii avocado filling should look something like this now:
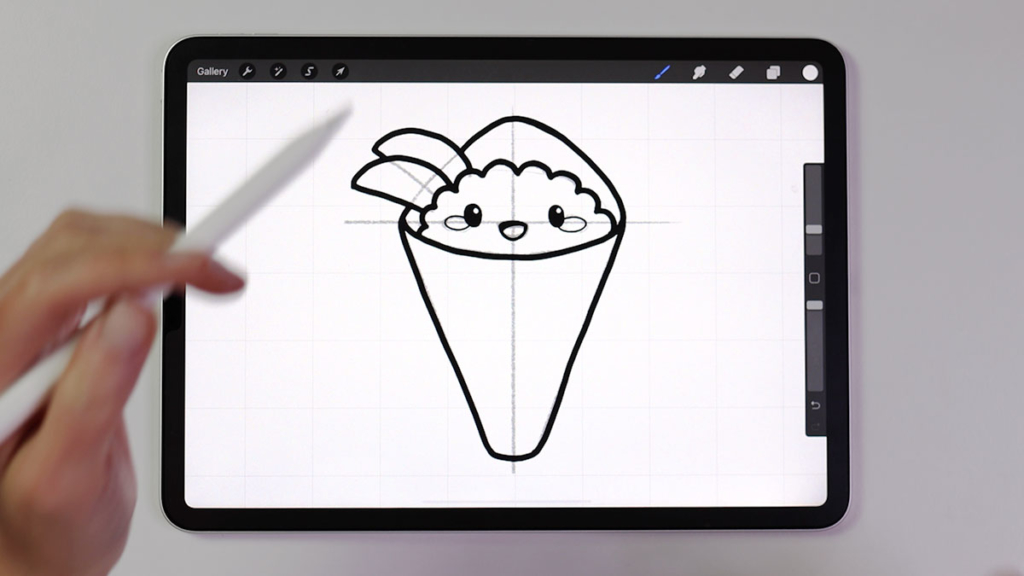
Step #3: Draw a Kawaii Sushi Face
The final piece of our Temaki sushi is a face. If you’re in Procreate, you’ll want to create another layer so we can move it around if necessary.
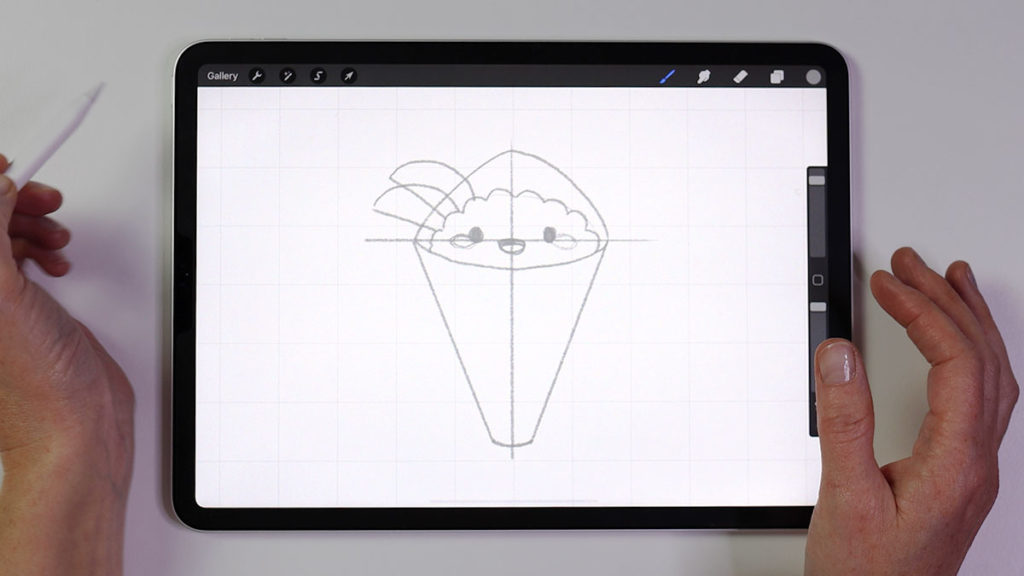
Using the drawing guideline we created in step #1, we’ll draw the eyes, making sure that they are spaced out equally and appear to be at the same height. Then we’ll add some cheeks and a big smiling mouth.
It’s always good to put cheeks in kawaii. It makes the drawing a lot cuter! Please don’t feel like you need to draw the same kawaii face I used. Just add your favorite kawaii face here!
The features we added should make the whole character appear to be balanced and symmetrical. I also added some little white dots in the eyes using the eraser tool. It brings the character to life and gives it some sparkle.
After we added the kawaii face, our Temaki sushi should look something like this:
Step #4: The Final Kawaii Sushi Outline
The last step is to create a polished outline. To do this, make another layer (if using Procreate). I am using the monoline brush in black because it has even thickness, and it has the streamline option. I made a video to show you how to create smooth lines in Procreate, if that’s something you struggle with.
If you’re using paper and pencil, use a thick marker or a felt-tip pen.
Once you’ve finished the outline, you can turn off the other layers or erase your pencil lines and voilà – your final kawaii sushi drawing is all ready for beautifying.
Awesome, You Did It!
Now, you get to add your creative touch to your Temaki drawing by adding colors and decorations.
When you finish, please share your drawing in our active and supportive Facebook group.
Here you’ll find inspiration, get your drawings in front of other people, and get lots of ideas from your fellow Kawaiians.
Thanks for drawing with me today and make sure to stay tuned for my next kawaii drawing tutorial.
For more helpful drawing resources, check out this post on common drawing myths debunked.
Share the Love
If you enjoyed this Temaki sushi tutorial, please share this post with your friends using the buttons below. It will make someone’s day! It sure will make mine. 🙂