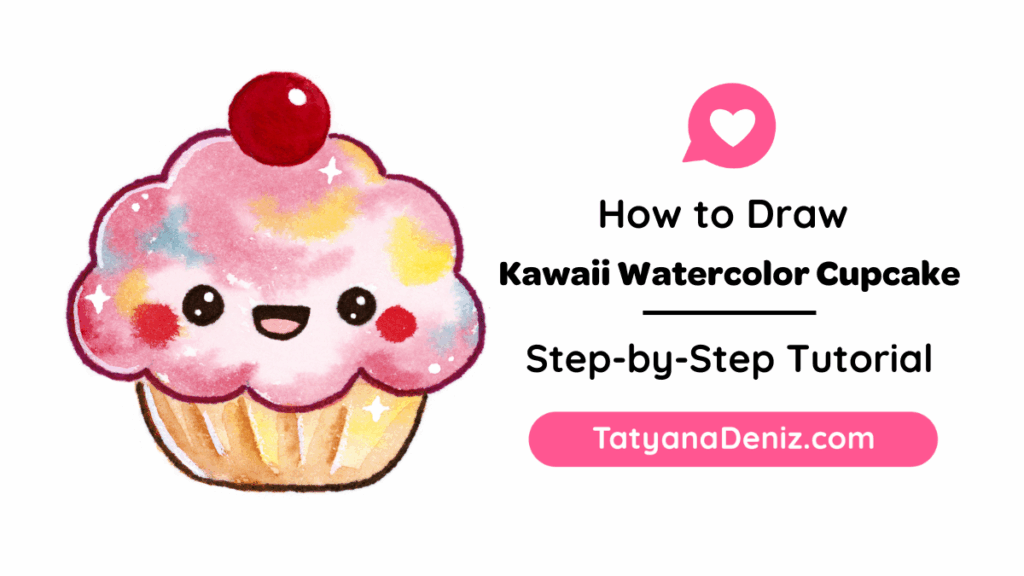
In this tutorial, you’ll learn how to draw a kawaii watercolor cupcake in 4 easy steps, using just a pencil, an eraser and paper, plus a little watercolor to finish. We start with two simple guide shapes, turn the top into fluffy frosting with a cherry, and then give it a happy little face.
Cupcakes are a classic kawaii food, and this one is extra sweet 🧁. The frosting is just a bumpy cloud shape, so it’s much easier than it looks.
It’s lovely for birthday cards, crafting with kids, or a cozy moment with your sketchbook. Take it 1 step at a time, and it will come out great!
Printable PDF
Please enjoy it for personal use, and please give me credit and link back to this post if you share it with others.
What You’ll Need
- Watercolor paper, or any thick paper that can handle a little water
- A pencil and an eraser for the guide lines
- A black waterproof pen for the final outline
- Watercolor paints or watercolor pencils and a small brush
- A white gel pen for the sparkles (optional)
How to Draw a Kawaii Watercolor Cupcake: Step-by-Step
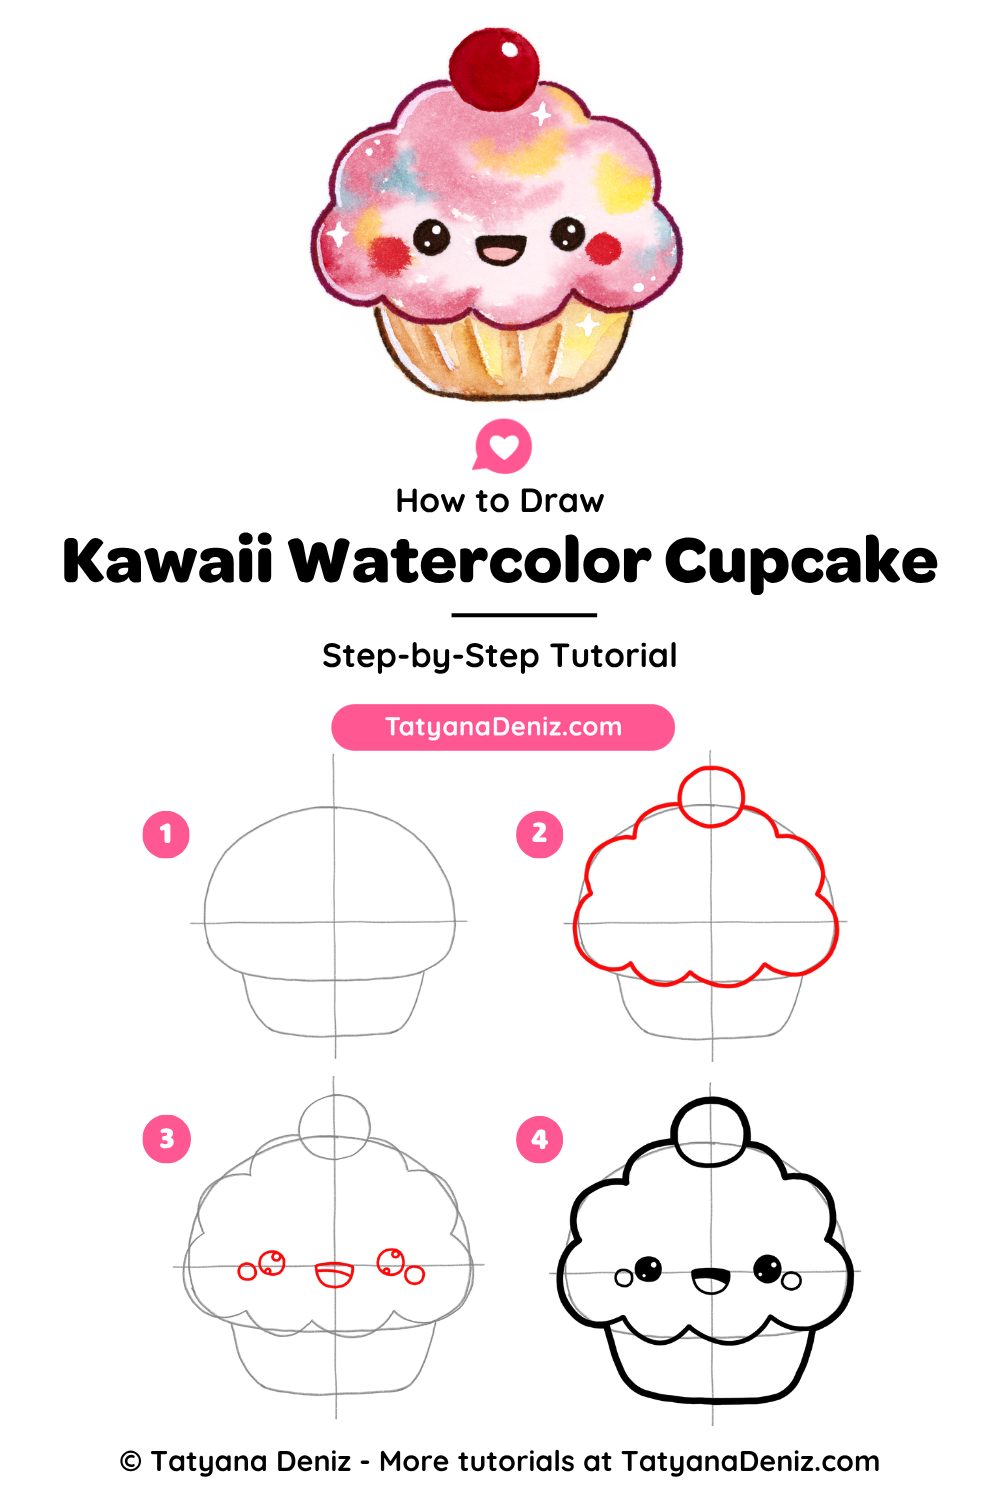
- Draw the guide shapes. Lightly sketch a vertical and a horizontal line to find the center. Draw a big rounded dome for the frosting, and under it a smaller wrapper that gets a little narrower at the bottom. Keep the frosting wider and taller than the wrapper.
- Draw the frosting and the cherry. Trace over the dome with soft, bumpy scallops, like a fluffy cloud. Let the bottom edge of the frosting wave over the top of the wrapper, then add a circle on top for the cherry.
- Add the face. Place it low on the frosting, right on the horizontal guide. Draw two eyes with a tiny highlight circle in each, a small open smile between them, and little blush circles just outside the eyes.
- Outline and paint. Go over the final lines with a black pen and erase the pencil guides. Then paint your cupcake with watercolor: pink frosting, a red cherry and a golden wrapper. Finish with a few colorful sprinkles and white sparkles.
Tips for a Cute Watercolor Cupcake
- Big frosting, small wrapper. The wrapper should look smaller than you expect. That contrast is what makes it kawaii.
- Shape first, scallops second. Get the overall dome right with a rough outline, then add the bumps. It’s really hard to do both at once.
- Keep the face low. Eyes and smile sit on the horizontal guide, near the bottom of the frosting.
- Paint in light layers. Start with light colors, let each layer dry, then add stronger color and details at the end.
- Save the sparkle for last. A few white dots and stars on the frosting make it look shiny and fresh.
Frequently Asked Questions
Yes, it’s made for complete beginners. There are only 4 steps, and you start with just two simple guide shapes. It’s also a lovely one to draw with kids.
A pencil, an eraser and paper are all you need for the drawing. A black waterproof pen helps for the final outline. To paint it, use watercolor paints or watercolor pencils on thick paper that can handle water.
Of course! The line drawing looks super cute on its own, and you can color it with colored pencils or markers instead. You can also follow the same 4 steps in Procreate on your iPad.
Make the frosting big and the wrapper small, smaller than you would expect. Then place the face low on the frosting and add little blush circles next to the eyes. Soft, rounded shapes do the rest.
Start with light colors and build them up in layers, letting each layer dry before the next one. Add the darker colors and details last. Colors get a little lighter as they dry, so make them slightly stronger to start.
Try another kawaii food from the list below, like the hot dog, the sushi temaki or the popsicle. If you’d like another cupcake, my super cute cupcake tutorial has swirly frosting and a little bow.
If you loved drawing this cupcake, you’re ready to create your very own kawaii characters 😊. My 21 Day Challenge guides you there in about 15 minutes a day, even if you’re a complete beginner.
More “How to Draw Kawaii” Tutorials
If you enjoyed this tutorial, you will also love:
- How to Draw a Super Cute Cupcake: Step-by-Step Drawing Tutorial
- How to Draw Kawaii Hot Dog Step-by-step
- How to Draw Kawaii Sushi Temaki: Step-by-step Drawing Tutorial with Video
- How to Draw a Cute Cartoon Popsicle with a Face Step-by-step
- How to Draw Kawaii Sweet Peas: Step-by-step Drawing Tutorial
Share the Love
Share your drawing on Instagram and tag @tatyanadeniz or #tatyanadeniz. I would love to see it!
Spread the sweetness by sharing this tutorial with your friends using the buttons below 👇. Let’s keep the creativity flowing and the cute vibes going strong!