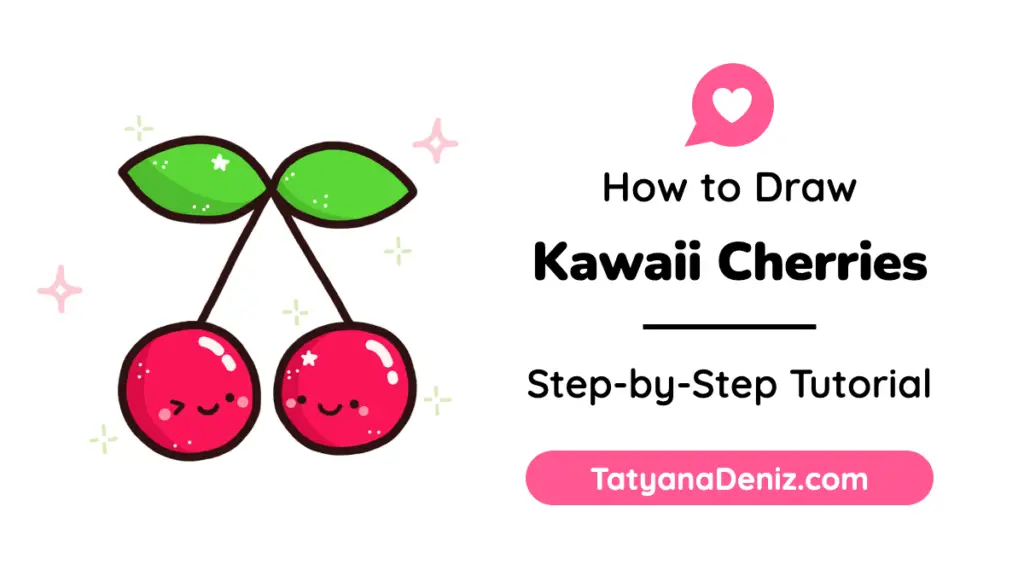
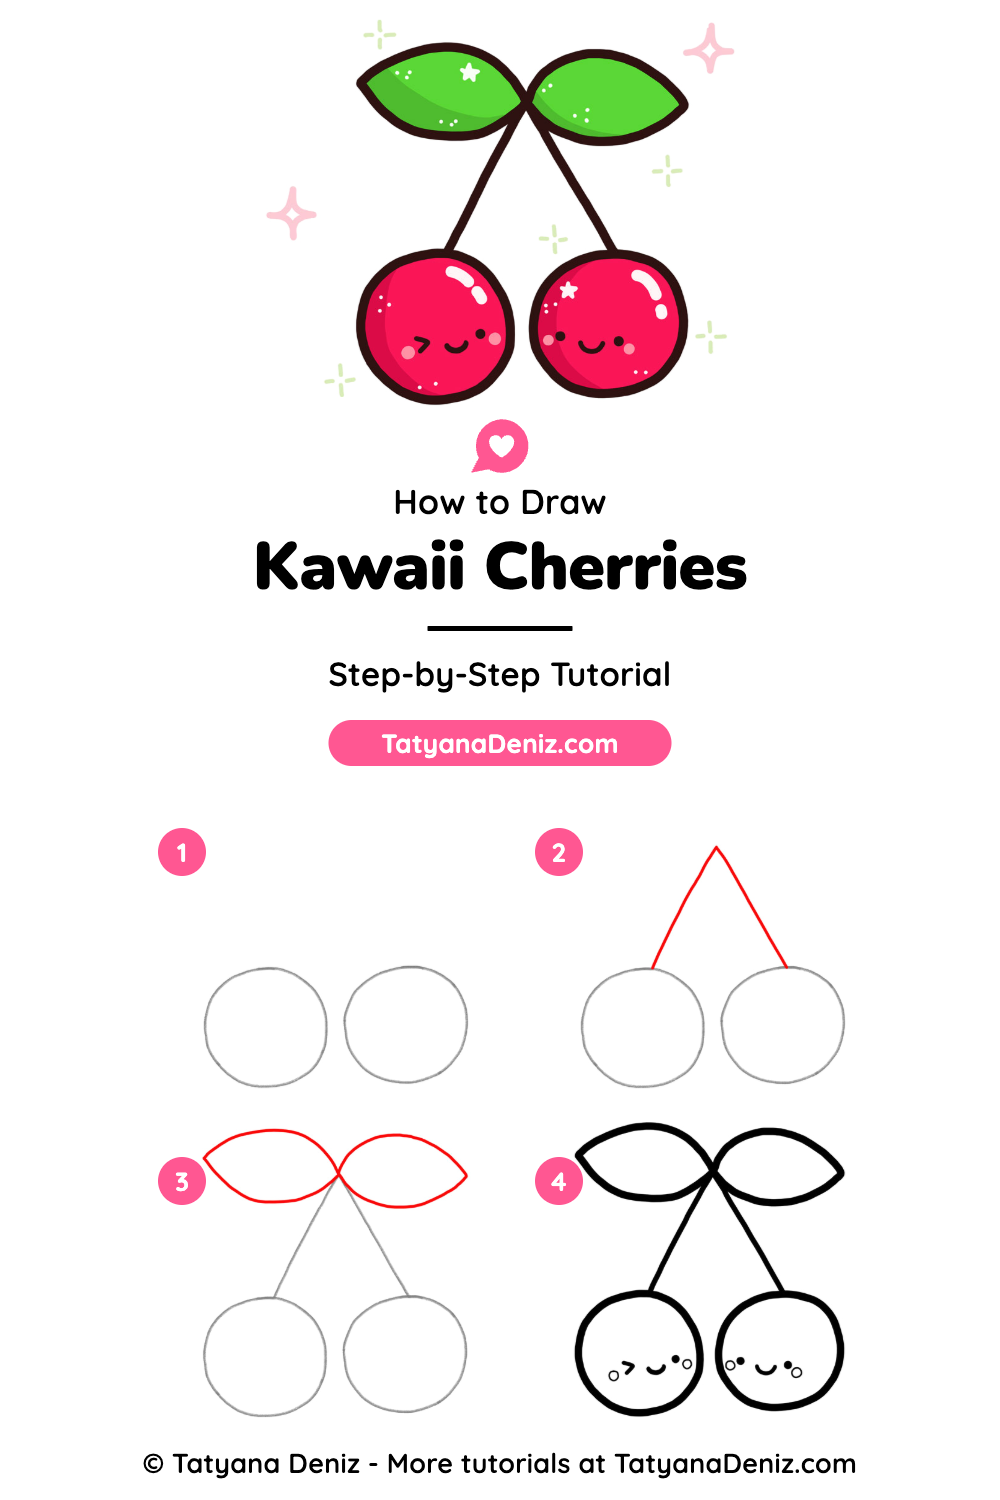
In this tutorial, you’ll learn how to draw kawaii cherries in 4 easy steps, using just a pencil, an eraser and paper (or Procreate on your iPad). We start with two simple circles, add the stems and leaves, and finish with two happy little faces.
Cherries are one of my favorite kawaii fruits to draw 🍒. They always come in pairs, so you get to give each one its own little personality: one winking and one smiling.
They’re perfect for cards, sticker sheets and sketchbook doodles, and a lovely one to draw with kids. Take it 1 step at a time, and it will come out great!
Printable PDF
Please enjoy it for personal use, and please give me credit and link back to this post if you share it with others.
What You’ll Need
- Paper or a sketchbook
- A pencil and an eraser for the guide lines
- A black pen for the final outline
- Colored pencils or markers in red, pink and green
- Or simply Procreate on your iPad, if you prefer to draw digitally
How to Draw Kawaii Cherries: Step-by-Step
Follow the 4 steps in the tutorial image above. The new lines in each step are drawn in red.
- Draw two circles. Sketch two circles of the same size side by side, with a small gap between them. Keep your pencil lines light so you can adjust them.
- Add the stems. From the top of each cherry, draw a thin line going up and toward the middle. Let the two lines meet in a point above the gap, like an upside-down V.
- Draw the leaves. Where the stems meet, draw two leaves: one pointing left and one pointing right. Each leaf is an almond shape, wide in the middle and pointed at the tip.
- Outline and add the faces. Ink the final lines and erase the extra pencil marks. Give the left cherry a winking eye, a dot eye and a small smile, and the right cherry two dot eyes and a smile. Finish with tiny round cheeks on both.
Tips for Cute Kawaii Cherries
- Keep the pair balanced. Draw both circles the same size and at the same height, so the cherries look like a matching pair.
- Give each cherry its own expression. A wink on one and a simple smile on the other makes the pair feel playful and full of character.
- Add a shine. Leave a few small white highlight marks near the top of each cherry to make them look glossy.
- Shade the bottom. A darker red along the bottom edge makes the cherries look round and juicy.
- Use a small color palette. Raspberry red, bright green and pink cheeks with a dark brown outline keep it fresh and cute. A few tiny sparkles around the cherries are a sweet finishing touch.
Frequently Asked Questions
Yes, it’s one of the easiest kawaii fruits to draw. It takes just 4 steps and starts from two simple circles. It’s also a fun one to draw with kids.
A pencil, an eraser and paper are all you need. A black pen helps for the final outline. Then color it with colored pencils, markers or Procreate on your iPad.
Draw a thin line from the top of each cherry toward the middle, so the two lines meet in a point above the gap. It looks like an upside-down V. The leaves then sit right where the stems meet.
Leave a few small white highlight marks near the top of each cherry, and add a darker red along the bottom. The contrast between light and dark makes them look round and glossy.
Use a bright raspberry red for the cherries with a darker red for the shading. Bright green works for the leaves, light pink for the cheeks and dark brown for the outline.
Try another kawaii fruit or treat, like the kawaii watermelon or the kawaii sweets. They use the same simple shapes and happy faces, so you can fill a whole page with cute food.
If you loved drawing these cherries, you’re ready to create your very own kawaii characters 😊. My 21 Day Challenge guides you there in about 15 minutes a day, even if you’re a complete beginner.
More “How to Draw Kawaii” Tutorials
If you enjoyed this tutorial, you will also love:
- How to Draw Kawaii Watermelon: Easy Step-by-Step Tutorial
- How to Draw Kawaii Sweets: 4 Easy Step-by-Step Tutorials
- How to Draw a Kawaii Watercolor Cupcake: Easy Step-by-Step Tutorial
- How to Draw a Cute Cartoon Popsicle with a Face Step-by-step
- How to Draw Kawaii Hot Dog Step-by-step
Share the Love
Share your drawing on Instagram and tag @tatyanadeniz or #tatyanadeniz. I would love to see it!
Spread the joy of drawing by sharing this tutorial with your friends using the buttons below 👇. Let’s keep the creativity flowing and the cuteness going strong!