This tutorial teaches you how to make gradients in Procreate using 3 methods: radial gradients, linear gradients, and gradients applied as fills with a clipping mask. All three use the same core tool — Gaussian blur — applied to overlapping colour bands or circles to create smooth, seamless transitions between colours. The full video walkthrough is embedded above, and each method is broken down step by step below so you can follow along at your own pace in the Procreate app.
Let’s look at each of the gradient types in detail.
1. How to Make Radial Gradients in Procreate
We’re going to start by creating a radial gradient using 3 colors. To start, open up your Procreate App and pick your first color. For this tutorial, I’m choosing red for my drawing of the circle. Make sure the circle is big enough to fill the canvas, and then once you’ve got the size you want and it’s in the centre of the canvas, fill in the edges with that same color.
To keep things simple, I’m going to draw my next circle on the same layer. After choosing your second color, draw a second circle and make it as big or as small as you want. You can edit the shape after you draw it. Then in the middle, we’re going to add a contrasting color by drawing a circle in the centre and filling it with yellow.

Now to create the gradient is super simple. Start by going to your adjustments option and pick Gaussian blur for the layer level. Then all you do is drag your pencil over to decide how much blur you want to create. You can decide if you want the gradient to be very smooth or a bit blurry. Both are great for backgrounds or to add shading to a character.
And that’s how you make radial gradients in Procreate!

2. How to Make Linear Gradients in Procreate
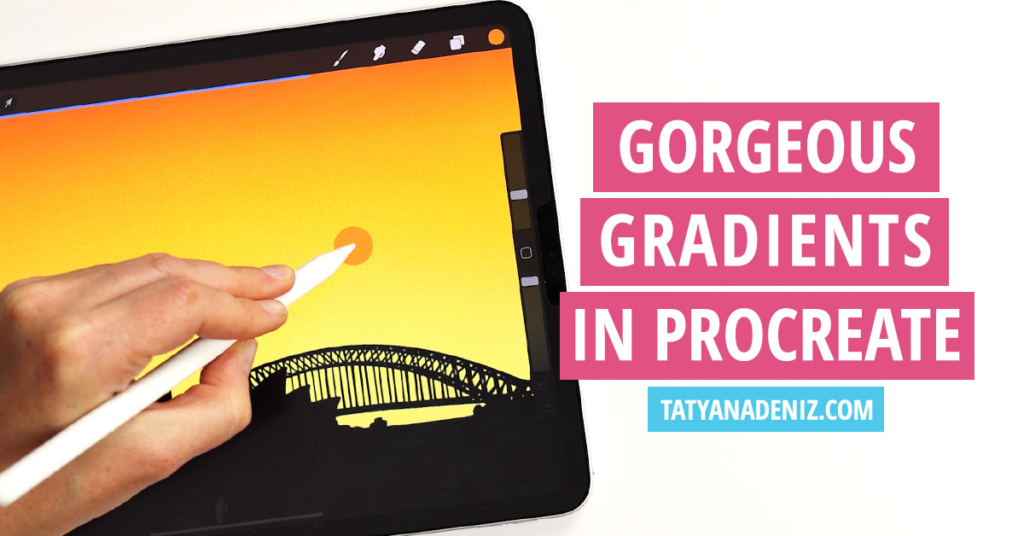
The next gradient we can create in Procreate is a linear gradient, kind of like a sunset. The process is very similar.
BONUS! Download my essential Procreate brushes for FREE!

Start by taking off the first layer and using the same red color again. For this gradient, you a few options. The easiest is to choose three colors and create a band across the canvas for each color.
Don’t worry about being super precise here. You could even do some waves if you want a varied sunset.
Finally, we want to blur it by using the Gaussian blur by dragging it over the layer where your colors are. Now you have a gorgeous backdrop where you can add your drawing or silhouette over top of it.

3. How to Use Gradients as Backgrounds and Fills
Then finally, our last gradient in Procreate is a linear gradient that we will use as a fill. Let’s start by creating a stripe design using color bands. Choose as many colors as you’d like!
Then apply the Gaussian blur to the layer with your colors, and now you have an exciting design.

Now, let’s say you want to put it inside of a cloud as a texture. Firstly, start by making another layer that sits below your gradient in Procreate. After that, hide the gradient layer to see what you’re drawing and then bring back the gradient layer after finishing the shape. Then tap on it and select clipping mask.

Now the layer is clipped to the boundary of the layer below it. To see the gradient, you simply click the arrow tool to select its layer, and now you can do whatever you’d like with your gradient design.
Gradients are a great way to add a unique design to the background of your drawing. Furthermore, you can continue to adjust the gradient once it’s sitting inside your shape by continuing to use the Gaussian blur tool. But for this design, I’m happy with how the original gradient turned out, so all I’m going to do now is add details.

If you found this tutorial helpful, make sure to check out my YouTube channel for lots more Procreate tutorials.
For example, do you get blurry lines in Procreate? Check out this post on how to fix blurry edges in Procreate!
Digital Drawing Materials
When I draw digitally, I love using an iPad with an Apple Pencil. I also have these 2 little extras that make a HUGE difference!! I’ll link to them (affiliate links), so you can easily find them.
Join Our Facebook Group
Join our safe and friendly community on Facebook to share your kawaii art, get feedback, and connect with like-minded creatives. Create, share, and celebrate cuteness together!
Share the Love
If you found this Procreate tutorial helpful, please share it with your friends using the buttons below. I truly appreciate your support!
FAQ
The main tool is Gaussian blur, found under Adjustments in the Procreate menu. You paint your colour bands or circles on a layer first, then drag the Gaussian blur slider to blend them into a smooth gradient. The more you drag, the softer and more seamless the transition becomes.
Yes — the linear gradient method on this page is ideal for backgrounds. Paint two or three colour bands across your canvas, apply Gaussian blur to the layer, and you have a smooth gradient backdrop ready to place artwork or silhouettes on top of.
Create your gradient on one layer, then draw your shape on a separate layer below it. Make the gradient layer active, tap it, and select Clipping Mask. The gradient will be clipped to the boundary of the shape below, filling it with colour while leaving the rest of the canvas clean.
No special brushes are needed. You create the base colours using any solid brush, then the Gaussian blur adjustment does the blending work for you. This makes the technique accessible to beginners who are still building their brush toolkit.
A radial gradient radiates outward from a centre point, like a glowing circle — it is built from concentric circles of different colours. A linear gradient transitions from one colour to another in a straight line across the canvas, like a sunset sky. Both use the same Gaussian blur technique; the difference is just in how you arrange the initial colour shapes.